Step 4: Edit Content - LocalGov Drupal Walkthrough
Make changes to an existing service page using the WYSIWYG editor
Great! You've deployed the demo
Now let's walk through what you just deployed and see it in action.
Start WalkthroughChoose your next step
Generate Evidence Pack
Create your business case documentation with what you've learned.
Generate Evidence PackWalkthrough progress
Step 4 of 11 • 4 minutes
Edit Content
Learn how to find and edit content using Drupal's WYSIWYG editor.
Expected outcome
- You can find and open content for editing
- You've made a simple text change
- You've previewed and saved your changes
Finding content to edit
There are two ways to edit content in LocalGov Drupal:
Method 1: From the page itself
- Navigate to any page on the site
- Click the "Edit" tab in the admin toolbar
- The page opens in editing mode
Best for: Quick edits when you're browsing the site
Method 2: From the Content admin
- Click "Content" in the admin toolbar
- Find the page you want to edit
- Click "Edit" in the Operations column
Best for: Managing multiple pages, bulk operations
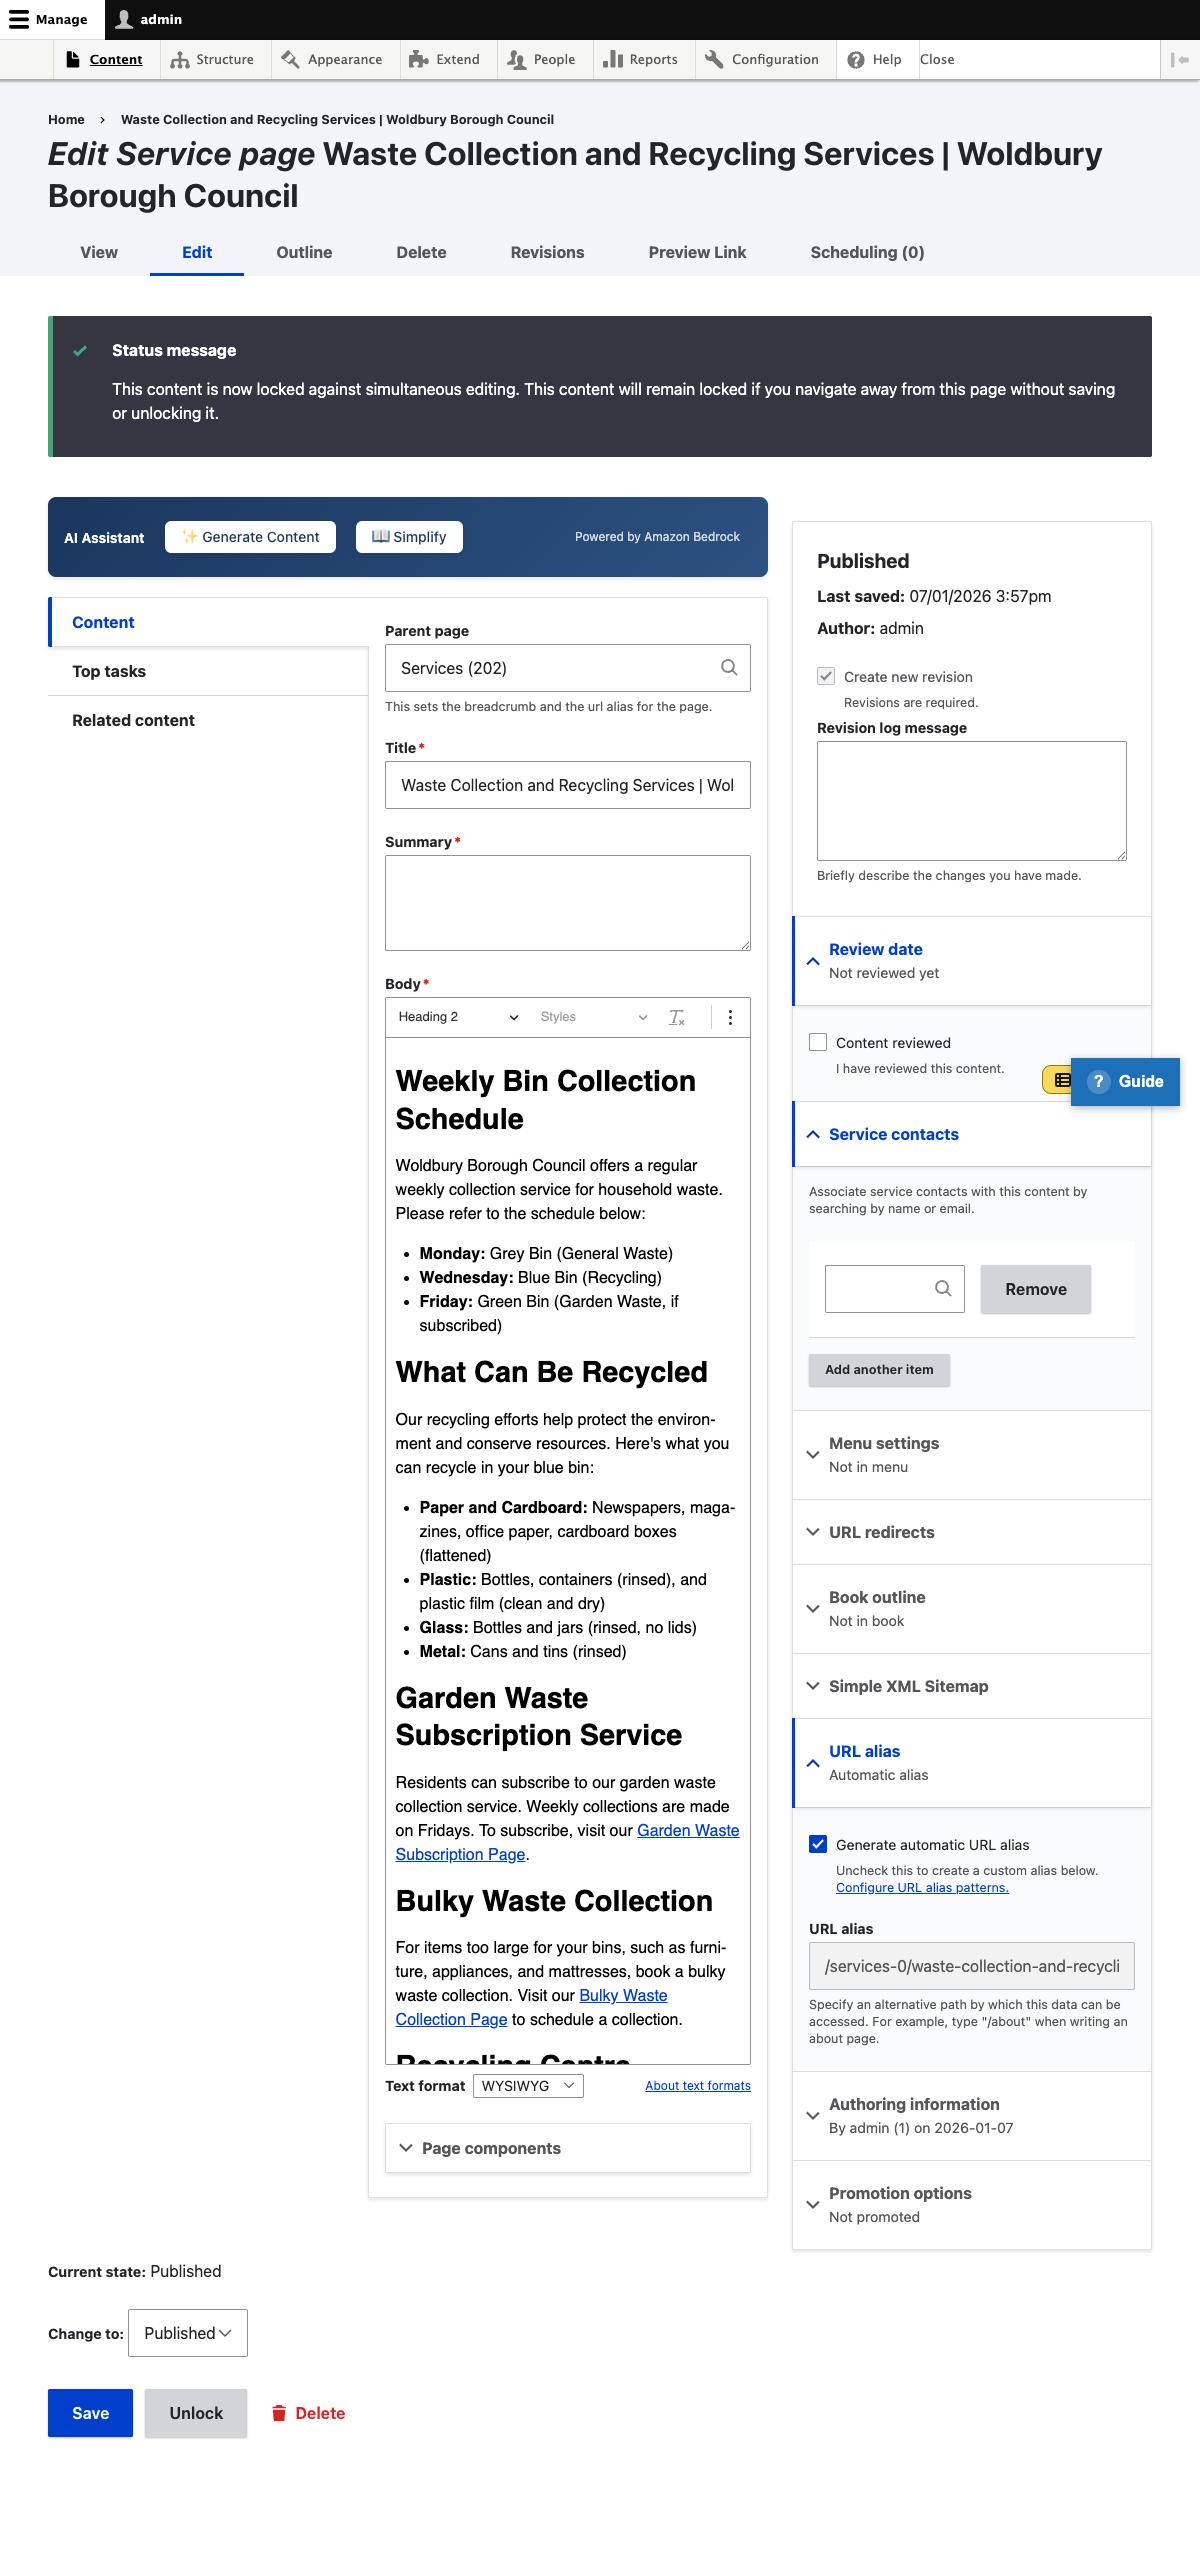
Try editing a service page
Let's edit the "Waste & Recycling" service page:
-
Navigate to the page
Click "Waste & Recycling" in the main navigation
-
Click "Edit" in the admin toolbar
You'll see the editing form with all the page fields
-
Find the body text field
Scroll down to the main content area with the WYSIWYG editor
-
Make a simple change
Add a sentence at the end of the first paragraph, for example:
"We're committed to making recycling easy for all residents." -
Preview your changes
Click the "Preview" button at the bottom of the form
-
Save the page
Click "Save" to publish your changes
The WYSIWYG editor
LocalGov Drupal uses CKEditor, a familiar word processor-style editor:
- Bold, italic, underline - Format text like a word processor
- Headings - Use the Format dropdown to apply H2, H3, etc.
- Lists - Create bulleted or numbered lists
- Links - Highlight text and click the link button
- Images - Upload or embed images in content
- Tables - Insert tables for structured data
Accessibility tip: Always use proper headings (H2, H3, H4) instead of just making text bold. This helps screen readers navigate your content.
Revision history
Every edit creates a revision, so you can always go back:
- Click the "Revisions" tab when viewing a page
- See all previous versions with timestamps
- Compare changes between versions
- Revert to a previous version if needed
Try this: After saving your edit, click "Revisions" to see your change in the revision history.
Want to try AI-powered editing? The next step covers AI features that can generate content and simplify text to plain English.